Concrete pumps are the backbone of efficient modern construction, but when they break down, they could bring the entire project to a grinding halt. Downtime translates directly into lost productivity and skyrocketing costs. Whether you’re dealing with a complete blockage, a sudden loss of pressure, or mysterious hydraulic issues, knowing how to quickly and safety diagnose the problem is critical.
This comprehensive guide to concrete pump troubleshooting is designed to be the go-to resource, providing clear, step-by-step instructions to get the equipment back in operation and keep the project on schedule.
Essential Precautions Before Troubleshooting – Safety First
Before we attempt to diagnosse or fix any issue with concrete pumps, the first priority must be safety.
The immense pressures, powerful mechanical forces, and heavy materials involved make a malfunctioning pump extremely dangerous.
Ignoring safety protocols could lead to severe injury, equipment damage, and costly liabilities.
Always adhere to the manufacturer’s specific safety guidenlines outlined in the operator’s manual. The following are universal safety rules that must be observed.
Relieve All System Pressure
Hydraulic and pneumatic systems store significant energy. Before disassembling any hose, valve, or component, the entire sytem must be completely depressurized. Engage the pump’s safety locks and follow the correct procedures to bleed off pressure from both the hydraulic and materials delivery systems.
Lock Out / Tag Out (LOTO)
This is a non-negotiable practice. Disconnect and lock out the main power source to the concrete pump. Use a dedicated lock and tag to inform everyone that the equipment is under maintenance and must not be energized. This prevents accidental startup, which is a leading cause of serious accidents.
Wear Appropriate Personal Protective Equipment (PPE)
- Safety glasses or a face shield to protect against hydraulic fluid sprays and concrete splatter.
- Heavy-duty gloves to safeguard the hands from sharp edges and hot components.
- Steel-toesd boots for foot protection.
- Hearing protection in noisy environments.


Secure the Boom and Outriggers
If you are working on a boom pump, ensure the boom is fully retracted and securely placed in its cradle. The outriggers must be fully extended and stabilized on a firm, level surface to prevent any risk of the machine tipping or shifting.
Never Work Under a Pressurized System
Never inspect, tighten, or repair hoses, fittings, or components while the system is under pressure. A pinhole leak in a high-pressure hydraulic line can inject fluid into the skin, causing sever injury or poisoning.
Clear the Work Area
Keep unauthorized personnel away from the work area, especially those without proper training. Ensure you have adequate space and lighting to perform the work safely and effectively.


Remember: There is no troubleshooting task so urgent that it cannot be done safely. If you are unsure about any procedure, stop and seek guidance from a qualified professional.
Diagnostic Approaches of Concrete Pump Troubleshooting
A methodical approach is the key to efficient concrete pump troubleshooting. Randomly checking components is a waste of time and coulde lead to misdiagnosis. The following step-by-step diagnostic process will be helpful to systematically narrow down the cause of any malfunction. For visual learners, we have included a simplified diagnostic flowchart below.
Concrete Pump Troubleshooting Diagnostic Flowchart


Step1 Observe the Symptoms and Machine Behavior
Start by gathering information. Don’t just note that the pump “isn’t working”. Be precise.
- Is there no concrete output at all?
- Is the output slow or pulsating?
- Is the hydraulic pressure gauge reading low, high or fluctuating?
- Are there any visible leaks (hydraulic oil or concrete)?
- Is there unusual smoke or smell from the engine or electric motor?
Documenting these specific symptoms is the first and most critical clue.


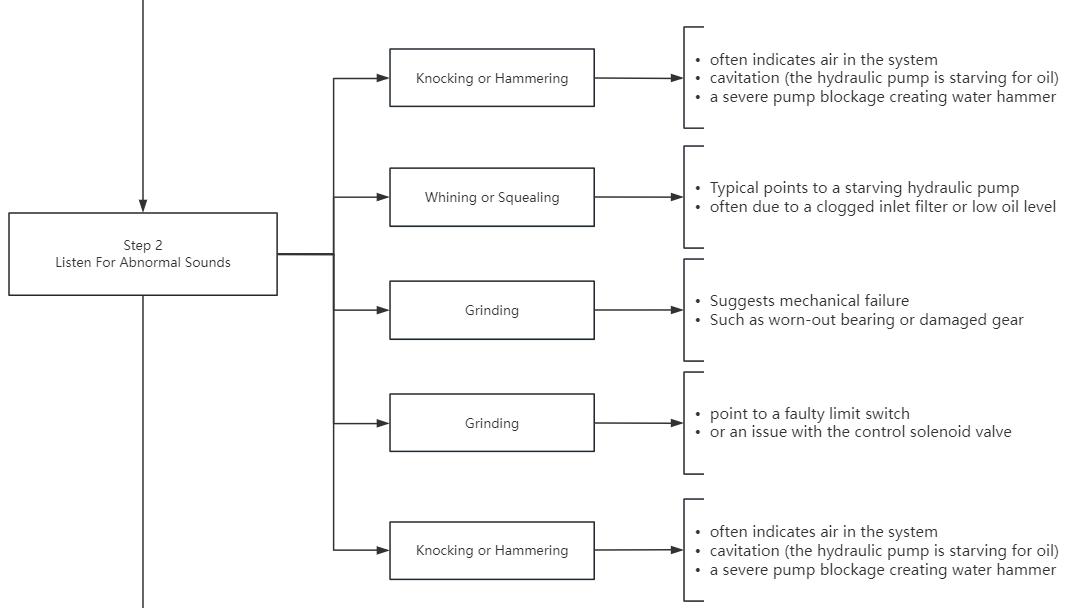
Step2 Listen for Abnormal Sounds
Your ears are powerful diagnostic tools. Shut out background noise and listen carefully to the pump.
- Knocking or Hammering
Often indicates air in the system, cavitation ( the hydraulic pump is starving for oil), or a severe pump blockage creating water hammer.
- Whining or Squealing
Typically points to a starving hydraulic pump, often due to a clogged inlet filter or low oil level.
- Grinding
Suggests mechanical failure, such as worn-out bearing or damaged gear.
- Inconsistent Cylinder Cycling Sounds
Could point to a faulty limit switch or an issue with the control solenoid valve.


Step3 Check All Gauges and Indicators
The machine’s gauges provide direct insight into its internal state.
Hydraulic Pressure Gauge: This is the most important instrument.
- Pressure is Low: Points to issues with the hydraulic pump, relief valve, or internal leaks.
- Pressure is High: Usually signals a blockage in the concrete delivery system.
- Pressure is Erratic: Could indicate air in the hydraulic fluid, a sticking valve, or a failing pump.
Engine RPM/ Motor Load Meter: Ensures the prime mover is delivering adequate power.
Temperature Gauge: Check for overheating in the hydraulic oil or engine coolant.


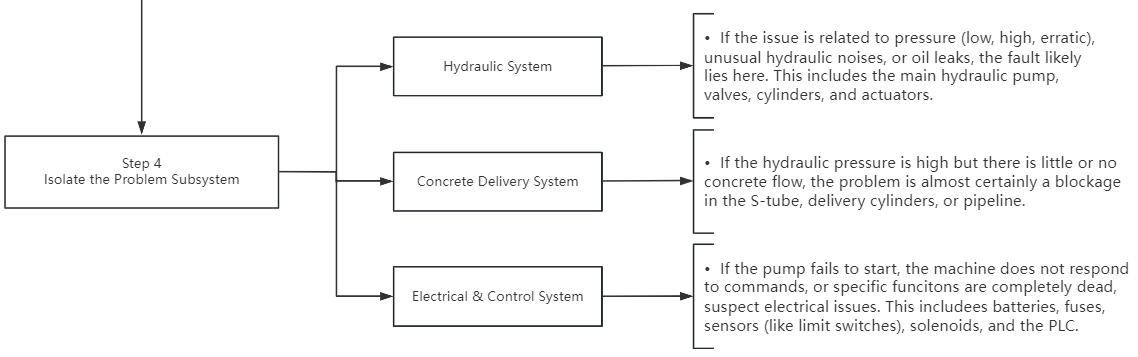
Step4 Isolate the Problem Subsystem
Baed on your observations from step1-3, you can now logically isolate the problem to one of the three main subsystems:
- Hydraulic System
If the issue is related to pressure (low, high, erratic), unusual hydraulic noises, or oil leaks, the fault likely lies here. This includes the main hydraulic pump, valves, cylinders, and actuators.
- Concrete Delivery System
If the hydraulic pressure is high but there is little or no concrete flow, the problem is almost certainly a blockage in the S-tube, delivery cylinders, or pipeline.
- Electrical & Control System
If the pump fails to start, the machine does not respond to commands, or specific funcitons are completely dead, suspect electrical issues. This includees batteries, fuses, sensors (like limit switches), solenoids, and the PLC.


By following this logical sequency, you transform a overwhelming problem into a manageable diagnosis. The following sections will delve into the specific solutions for the problems you’ve now identified.
Common Concrete Pump Problems and Solutions
Here, we dive into the most frequent issues occur on the job site. For each problem, we break down the symptoms, root causes, step-by-step solutions, and crucial prevention tips.
Pump Blockages (The Most Common Issue)
A concrete pump blockage is the first cause of downtime. It occurs when the concrete mix stops flowing freely through the delivery system.
Symptoms
A sudden, sharp increase in hydraulic pressure.
The pump cylinders stall and concete output stops completely.
Audible “water hammer” or knocking sounds from the pipeline.
Possible Causes
- Poor Concrete Mix Design: Slump is too low (too dry), or the mix is too harsh.
- Oversized Aggregate: Stone larger than the pipeline diameter or pump specifications.
- Improper Pipeline Management: Not cleaning lines properly before or after use, leaving residue that hardens.
- Long Pausing Times: Allowing the concrete to sit stagnant in the line for toom long.
Step-by-Step Solutions
Immediate Action: First, try to clear the blockage by reversing the pumping direction for a few strokes. This can often such the concrete plug back.
Locate the Blockage: If reversing fails, disassemble the pipeline at the most likely point (often at a coupling or bend) to locate the plug.
Clear the Line: Once located, use a high-pressure air nozzle (with a safety line attached) or a pipelne cleaner (a.k.a. “pump pig”) to push the blockage out.
Clean the S-Tube and Cylinders: If the blockage is in the pump itself, you must safely dismantle and thoroughly clean the S-tube, hopper, and delivery cylinders.
Prevention Tips
- Ensure the concrete mix has the corrrect slump and is pump-friendly.
- Always perform a pre-pump “sponge ball” or “goop” cleaning procedure.
- Flush the pipeline with water immediately after pumping is complete.


Low Pressure or No Pressure
When pumps lacks the power to push concrete, a concrete pump pressure loss should be dealed with. This points to a failure in the hydraulic system to generate or maintain force.
Symptoms
- Weak or slow cylinder movement, even with no concrete load.
- Low reading on the main hydraulic pressure gauge.
- The pump struggles or fails to prime and start the concrete flow.
Possible Causes
- Low or Contaminated Hydraulic Oil: Insufficient oil level, or oil that is old, thin, or filled with debris.
- Worn Main Hydraulic Pump: Internal components of the pump are worn and can no longer generate rated pressure.
- Faulty or Incorrectly Adjusted Relief Valve: The valve is bleeding off pressure prematurely.
- Damaged Cylinder Seals: Worn piston seals in the delivery cylinders allowing hydraulic pressure to bypass.
Step-by-Step Solutions
Check Hydraulic Oil: Verify the oil level and inspect its condition. If it’s milky, dark, or has a burnt smell, change it and the filters immediately.
Inspect the Relief Valve: Consult the manual to test and adjust the sytem’s relief valve settings.
Check for Internal Leaks: Inspect the delivery cylinder seals for bypassing. With the pump running and discharge closed, observe if the cylinders are slowly moving.
Prevention Tips
- Stick to a strict hydraulic oil and filter change schedule.
- Regularly check for and repair external hydraulic leaks.
- Monitor hydraulic oil temperature to prevent overheating and breakdown.


Hydraulic System Problems
The hydraulic system is the heart of a concrete pump. Issues here can manifest in various ways, leading to concret pump hydraulic problems.
Symptoms
- Hydraulic oil overheats frequently.
- Erratic or sluggish operation of all hydraulic functions.
- Unusual whining or cavitation noises from the hydraulic pump.
Possible Causes
- Contaminated Oil: The most common cause, leading to valve sticking and pump wear.
- Clogged Suction Line Filter or Breather: Restricting oil flow to the pump, causing caviation.
- Hydraulic Pump Cavitation: Air is being drawn into the pump, often due to a leaking suction line or low oil level.
- Sticking or Worn Control Valves: Spools in the main control valve bank are not moving freely.
Step-by-Step Solutions
Change Oil and Filters: This is the first and most effective step for many hydraulic issues.
Check the Suction Side: Inspect the inlet filter, breather cap, and all suction line connections for leaks or restrictions.
Test Valve Function: Manually operate solenoid valves and inspect the main control valve for sticky spools.
Prevention Tips
- Maintain a super-clean environment when working on the hydraulic system.
- Use only the recommended grade of hydraulic oil.
- Regularly check hose and fitting integrity.

Irregular Cylinder Movement
Smooth, alternating cylinder movement is essential for continuous concrete flow. When this rhythm is broken, it often points to an electrical or control issue.
Symptoms
- Cylinders moving out of sequence or not fully retracting/protruding.
- One cylinder moves while the other remains stationary.
- The pump “hunts” or cycles erratically.
Possible Causes
- Faulty Stroke Control Sensors: The proximity switches or limit switches that control the cylinder reversal are misaligned, dirty, or failed.
- Broken Wiring or Connections: The electrical signal from the sensor to the control box is interrupted.
- Failed Solenoid Valve: The electro-hydraulic valve that directs oil to the cylinder reversing mechanism is stuck or broken.
Step-by-Step Solutions
Check the Sensors: Locate the stroke control sensors (usually near the delivey cyliders). Check their alignment, clean their faces, and test their function with a multimeter.
Inspect the Wiring: Trace the wiring from the sensors back to the controller, looking for frayed wires or loose connections.
Test the Solenoid: Listen for a distinct “click” when the cylinder is meant to reverse. If no sound, test the solenoid coil and electrical supply.
Prevention Tips
- Regularly clean and inspect sensors and their mounting points.
- Protect wiring harnesses from damage and exposure to the elements.
- Keep electrical connections clean and tight.


Troubleshooting by Pump Type
While the core principles of concrete pump troubleshooting are universal, different pump designs have their own unique quirks and common failures. Identifying the specific issues related to the equipment type can dramatically speed up the diagnostic process.
Boom Pump Specific Issues
Boom pumps (or truck-mounted pumps) integrate a complex hydraulic boom system with the pump unit. This adds another layer of potential hydraulic problems and mechanical wear.
Boom Movement is Slow or Erratic
- Causes
Worn-out swing bearings, damaged hydraulic rotators (manifolds) in the boom joints, failing boom cyinders, or issues with the proportional control valves.
- Solution
Inspect the boom wear pads and bearings for excessive play. Check the hydraulic pressure at the boom functions specifically. Listen for unusual grinding or binding sounds during movement.
")
Remote Control Failure
- Causes
Low battery in the transmitter, faulty receiver unit on the truck, broken antenna, or damaged wiring.
- Solution
Always start with the simplest fix – replace the transmitter batteries.
Check for error codes on the receiver display. Ensure the emergency stop on the remote is disengaged.
")
Tailer-Mounted Pump Specific Issues
Trailer pumps ( or line pumps ) are workhorses for smaller sites, but their simplicity brings a different set of common trailer concrete pump issues.
Failure to Prime
- Causes
Worn rubber piston seals in the delivery cylinders. Air leaks in the suction hose or hopper seal, or a clogged water trap.
- Solution
The most common fix is to replace the delivery cylinder pistons and seals.
Ensure the hopper gland is propoerly lubricated and the suction hose is airtight.
Excessive Vibration During Pumping
- Causes
The pump is not properly stabilized on the ground.
The outriggers are not fully extended or are on soft ground.
- Solution
Always set up the pump on a firm, level surface. Fully extend all outriggers if the ground is soft.

When to Call a Professional
Knowing the limits of your own expertise is a critical part of safe and effective troubleshootin. Attempting complex repairs without the proper tools, training, or technical data can turn a small problem into a catastrophi and expensive failure.

You should immediately stop and contact a certified technician if you encounter any of the following:
Major Hydraulic Pump Failure
Diagnosing and replacing a main axial piston pump requires specialized knowledge and calibration.
Cracked or Bent Structural Components
This includes issues with the boom arms, outriggers, or main frame. These are critical safety components.
Complex Electrical or Controller Faults
If the problem is traced to the main PLC or involves extensive wiring harness damage, professional diagnosis is required.
Persistent, Unexplained Problems
If you’ve followed all diagnostic steps but the issue remains unresoloved, it’s time to call in an expert with advanced diagnostic equipment.
Investing in a professional service call is always cheaper than the cost of a major component destroyed by incorrect repair attempts.
Preventive Maintenance Checklist
The most effective form of concrete pump troubleshooting is preventing problems before they start. A disciplined maintenance routine is far less costly than unexpected downtimie and repairs. Use this checklist as a foundation, but always prioritize the schedule in your operator’s manual.
Daily (Before Startup)

- Check engine oil, coolant, and fuel levels.
- Inspect hydraulic oil level and look for any visible leaks.
- Check and clean the grease points. Lubricate the hopper gland.
- Inspect delivery cylinder pistons for damage or excessive wear.
- Perform a visual inspection of the boom and outriggers ( on boom pumps).
Weekly / Every 50 Hours
- Check and clean the air filter.
- Inspect the tension of the V-belts on the engine/pump dirve.
- Check battery terminals for corrosion and secure connections.
- Verify the function of all emergency stop buttons.
Monthly / Every 250 Hours
- Take a sample of hydraulic oil and check for contamination.
- Change the hydraulic oil filters.
- Grease all boom and outrigger pivot points ( on boom pumps).
- Tighten all visible nuts and bolts to the manufacturer’s specified torque.
Mastering concrete pump troubleshootin is a combination of systematic thinking, deep knowledge of your machine, and an unwavering commitment to safety. This guide has provided you with a structured approach – from initial diagnosis using our step-by-step method, through solving the most common issues like blockages and pressure loss, to understanding the unique problems of your pump type.
Remember, consistent preventive maintenance is your strongest weapon against downtime.
Hot Models of LUTON Concrete Pump
Mini Concrete Pump
High-Pressure Concrete Pump
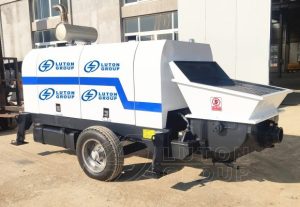
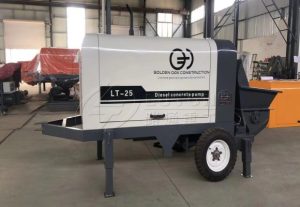
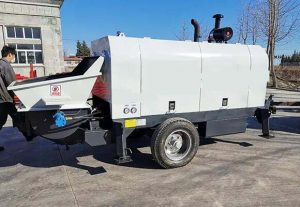
Concrete Trailer Pump
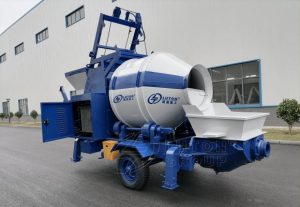
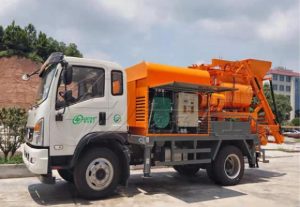
Concrete Mixer Pump
Concrete Boom Pump